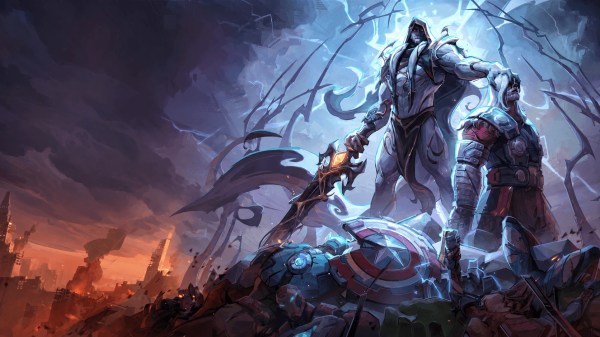






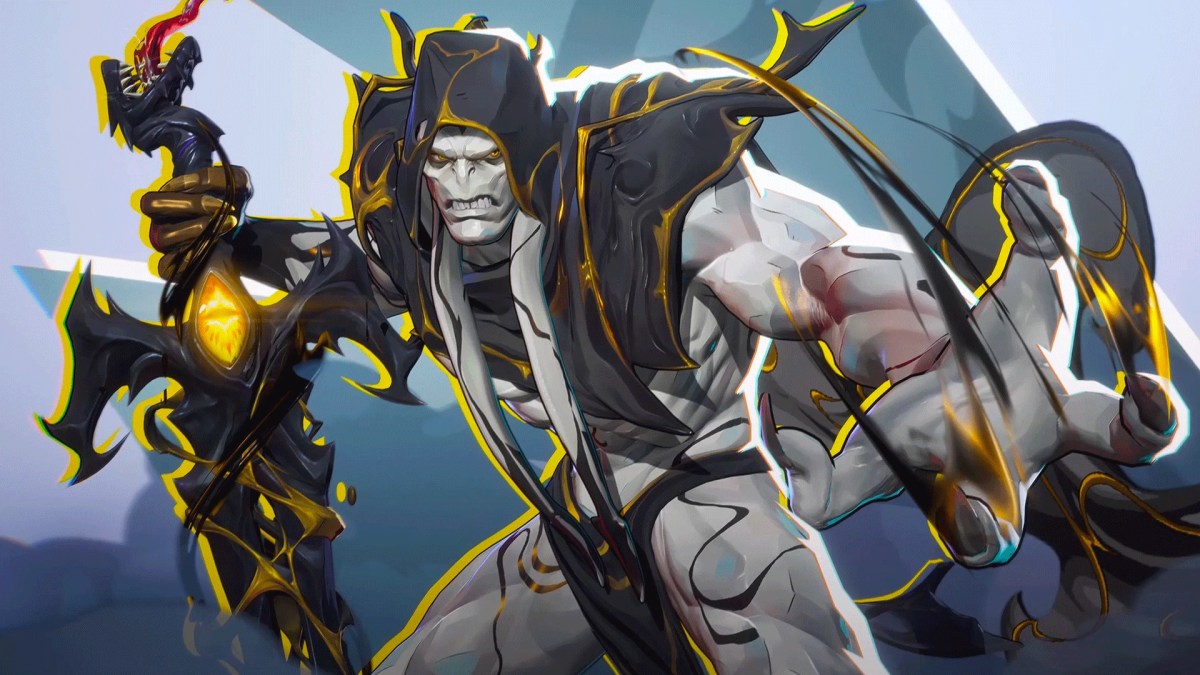
Gorr the God Butcher enters Marvel Rivals as a relentless, summons-driven Duelist built to dismantle fragile backlines and dominate close-quarters combat. To survive with his high-risk kit, you must master his summons and teleport resets. This is especially true after the latest changes outlined in the Marvel Rivals Season 10 Patch Notes.
This comprehensive Marvel Rivals Gorr guide covers everything from basic ability math to high-tier rotations that turn enemy Strategists into free eliminations.
Gorr Ability Breakdown: Synergies, Cooldowns & Math
To learn how to play Gorr in Marvel Rivals, begin by understanding his resource cycle. Gorr’s role involves more than merely swinging a sword. He also manages entity health pools, teleport anchors, and temporary shields.
Understanding these exact numbers separates silver-tier button-mashers from top-tier God Butchers.
All-Black (Primary Attack) & Symbiote Swarm (Passive)
Gorr’s primary attack, All-Black, is a 4-strike rapid melee combo with a 7-meter operational range. The sequence alternates slashes, dealing 20 damage on the first and third strikes and 30 damage on the second and fourth strikes to all enemies within range.
Gorr’s survivability mainly relies on his passive ability, Symbiote Swarm. Each point of damage dealt by active Black Berserkers is immediately converted into Bonus Health for Gorr, up to a maximum cap of 150 Bonus Health. Furthermore, defeating an enemy instantly spawns a Black Berserker at their location.
It stacks with his base 175 Health and 175 Regenerative Shield pool. Keep your summons active, or you will melt instantly in direct team fights.
Black Berserker (E) & Black Berserker Placement Rules
The E key spawns a Black Berserker with 150 HP that remains active until destroyed or recalled. You can hold up to two charges on a short cooldown, letting you apply immediate pressure at chokepoints.
Proper Black Berserker placement determines whether you survive an engagement. Never throw Berserkers directly into enemy fire, where splash damage destroys them instantly. Place them around corners, inside rooms, or on high ledges, out of direct line of sight.
These summons serve as your exit hatches.
Necro-Power (Right-Click / Mouse 2)
Necro-Power launches a symbiote mass forward that applies a Slow effect on contact. On hit, it teleports nearby Black Berserkers to the target (or spawns a new one if none are nearby).
Arriving Berserkers execute a two-strike melee attack that launches nearby enemies before reverting to ranged fire.
Use this ability to quickly target a single enemy. When you strike a Strategist with Necro-Power, your entire army immediately rallies to attack. This shifts passive area control into focused, targeted destruction.
Shadow Harvest Teleport (F) & Shadow Scythe Transformation
Pressing F activates Shadow Harvest, teleporting Gorr to a selected Black Berserker within 22 meters on a 3-second cooldown. Upon arrival, Gorr consumes the Berserker, gaining Bonus Health equal to 50% of its remaining health and triggering a symbiote explosion.
This temporarily transforms All-Black into Shadow Scythe for up to 4 slashes or 4 seconds, allowing Gorr to fire piercing shockwaves forward. Because Shadow Harvest consumes the targeted summon, ensure you spawn a new anchor before seeking a disengage route.
| Ability / Input | Cooldown / Usage | Core Function & Key Interaction |
| All-Black (LMB) | 0s | 3-hit melee cleave with a 7m operational range. |
| Symbiote Swarm | Passive | Passive sustain that converts all active summon damage into Bonus Health (up to 50 Max). |
| Black Berserker | Charge-based | Spawns a 150 HP active summon (maximum 2 active concurrently). |
| Necro-Power (RMB) | Short CD | Applies a 15% movement speed Slow while redirecting all active summons to the target location. |
| Shadow Harvest | 3 Seconds | Teleports directly to an active summon, triggering an explosion that empowers subsequent melee attacks. |
| Living Abyss | Medium CD | Grants an invulnerable dash forward, leaving an active Black Berserker behind at the origin point. |
| Twilight (Q) | Ultimate | Deploys a 10m Frenzy field that fully transforms and enhances All-Black. |
Living Abyss (Shift) & Ultimate: Twilight of the Gods (Q)
Living Abyss transforms Gorr into an Invincible symbiote mass that surges forward, leaving a Black Berserker behind at the origin point and driving active summons into a Frenzied State.
Upon landing, Gorr creates a Necroverse field that continuously damages trapped enemies, converting that damage directly into Bonus Health.
His Ultimate, Twilight of the Gods, instantly spawns a Black Berserker beside every enemy within a 10-meter radius and drives all active summons into a Frenzied State across a 30-meter field, preventing them from expiring.
While active for 12 seconds, All-Black morphs into the Annihilablade, expanding attack range to 10 meters and dealing 65 base damage plus 10% Max Health per strike
Placing this in enclosed objective points can secure a team wipe if your team capitalizes on it.
Best Gorr Combos in Marvel Rivals (Step-by-Step)
To maximize damage output, you must memorize specific input sequences. Executing Gorr combos in Marvel Rivals efficiently keeps enemies from reacting before they take lethal damage.
1. The “Anchor & Disengage” Standard Engagement Combo
This core rotation lets you engage backlines safely while keeping an escape route at all times.
| Step | Ability / Input | Execution & Movement | Tactical Mechanics & Result |
| Step 1 | Black Berserker (E) | Cast behind cover or on high ground. | Creates a safe cover anchor point for retreats. |
| Step 2 | Living Abyss (Shift) | Surge directly into the enemy backline. | Grants invulnerability and spawns a second Berserker at your starting position. |
| Step 3 | Necro-Power (RMB) | Fire into a high-priority squishy target. | Applies a 15% slow and redirects all active summons to target location. |
| Step 4 | Shadow Harvest (F) | Teleport onto the slowed target. | Triggers an arrival explosion upon arrival. |
| Step 5 | All-Black (LMB) | Land empowered Shadow Scythe hit + 2 basic attacks. | Delivers heavy burst damage to complete the assassination. |
| Step 6 | Shadow Harvest (F) | Reactivate to teleport back to initial cover anchor. | Safely resets position and escapes backline counter-attacks. |
It is quick, accurate, and practically undefensible when executed at the right moment.
2. The 275 HP Assassination Burst Combo
Use this high-burst variation to quickly take down 250–275 HP Duelists or Strategists before they can activate their defensive cooldowns.
| Step | Ability / Input | Execution & Movement | Tactical Mechanics & Result |
| Step 1 | Black Berserker (E) | Pre-place two summons surrounding the chokepoint or pathing route. | Sets up a dual-summon ambush kill-zone. |
| Step 2 | Necro-Power (RMB) | Tag the target directly as they enter the chokepoint. | Forces both active summons to leap onto the target simultaneously with a slow. |
| Step 3 | Shadow Harvest (F) | Trigger immediately to teleport into the center of the cluster. | Repositions directly on top of the target mid-ambush. |
| Step 4 | Animation Cancel | Cancel the teleport arrival animation into an immediate Shadow Scythe swing. | Delivers instantaneous, unblockable burst damage. |
| Step 5 | All-Black (LMB) | Finish with one basic melee slash. | Clears the remaining health pool to secure the elimination. |
Executing this sequence takes under 1.5 seconds, killing the target before they notice the source of the burst.
3. Ultimate Teamfight Wipe Combo
Use this combination when contesting close capture points or during overtime efforts.
| Step | Ability / Input | Execution & Movement | Tactical Mechanics & Result |
| Step 1 | Black Berserker (E) | Place outside the capture point boundary. | Establishes a safe external exit point outside the ultimate zone. |
| Step 2 | Twilight of the Gods (Q) | Cast in the center of the enemy formation. | Deploys a 10m Frenzy field and transforms All-Black into its empowered Annihilablade state. |
| Step 3 | Necro-Power (RMB) | Tag the highest-value target immediately. | Slows the priority target and focuses all summon aggro directly onto them. |
| Step 4 | Shadow Harvest (F) + All-Black (LMB) | Teleport repeatedly between active summons while holding primary fire. | Maximizes invulnerability frames and cleaves through the entire clustered enemy team. |
Team-Up Synergies & Team Comps
The right synergy loadout turns Gorr from a pesky flanker into a game-ending frontline threat. Marvel Rivals gives Gorr two powerful Team-Up options that adjust his attack profile based on your team’s tactical focus.
| Team-Up Ability | Partner Hero & Role | Operational Focus | Primary Benefit & Mechanics |
| Ragnarök | Hela (Duelist) | Solo-Queue / Frontline Brawling | Grants a Grounding Scythe Sweep ability and increases overall max health. |
| Hive Mind | Venom (Vanguard) | Coordinated Dive / Crowd Control | Unlocks a Symbiote Claw Pull while applying passive slows via summons. |
Team-Up Comparison: Ragnarök (Hela) vs. Hive Mind (Venom)
Ragnarök (Hela Synergy)
The base Team-Up lets you morph All-Black into a scythe, executing a sweeping strike that damages and Grounds enemies. Teaming up with Hela expands the scythe’s sweep range by 2 meters and scatters symbiote fragments on hit, restoring Bonus Health to Gorr and nearby allies.
Hive Mind (Venom Synergy)
The base Team-Up unlocks Symbiote Claw, which fires a piercing projectile that retracts at max distance and launches caught enemies directly toward Gorr. Teaming up with Venom boosts Black Berserkers’ damage and slows movement on every attack.
Best Gorr Team Comps (Dive & Brawl Meta)
Gorr performs best with highly aggressive Vanguards that split enemy attention. Pair him with Venom or The Thing to apply intense pressure on key objectives.
For your secondary Duelist slot, run heroes with high burst pressure like Black Cat or review The Hood Guide to build complementary flank lanes
Backline support should feature Ultron or Rocket Raccoon to supply continuous healing while Gorr operates deep behind enemy shields.
How to Counter Gorr & Avoid Hard Counters
While Gorr excels at close-range engagements, his reliance on summon positioning leaves him vulnerable to specific counter-picks. Knowing how to neutralize these threats keeps your win rate high.
| Enemy Hero | Role / Threat Level | Direct Counter Mechanism |
| Moon Knight | High (Duelist) | Bouncing projectiles rapidly wipe active summon nests and collateral Berserkers. |
| The Thing | Medium (Vanguard) | Heavy AoE ground slams instantly destroy clustered Berserkers. |
| Luna Snow | Critical (Strategist) | Absolute Zero freeze locks Gorr in place, completely denying teleport escapes and combos. |
| Flying Duelists | High (Vertical Meta) | Operates entirely out of range of 7m melee attacks and ground-bound summons. |
Top Gorr Counters
- Moon Knight & AoE Heavy Hitters: Marvel rivals Gorr counters with Moon Knight, whose ricocheting crescent blades automatically bounce between Gorr and his summons, quickly destroying 150 HP Black Berserkers.
- AoE Vanguards: The Thing instantly clears summon clusters with heavy ground slams, stripping away Gorr’s primary teleport anchors.
- Hard CC Strategists: Luna Snow’s freeze halts Gorr mid-animation. If you’re frozen before pressing Shadow Harvest (F), your 175 base HP melts instantly under focused fire.
- Airborne Heroes: Iron Man and Storm simply fly above Gorr’s 7-meter melee range, completely ignoring his grounded Berserker placements.
Counter-play Tactics: How to Survive Against Enemy Gorrs
When facing an enemy Gorr, eliminate his Black Berserkers immediately as they appear. This prevents his summons, disables his Shadow Harvest teleport, limits his Bonus Health gain, and ensures he can only fight with basic melee attacks.
Monitor his Living Abyss (Shift) cooldown. When he activates his invincible surge, quickly collapse on him to prevent him from establishing a new anchor point.
Visit our Rank Distribution Guide to understand where your current rank sits among the competitive player base.
Final Thoughts
Mastering Gorr involves effectively managing your teleport anchors and exploiting his brief 3-second Shadow Harvest cooldown. Once you’re adept at cycling his summons, you’ll find it easier to dominate matches and climb the ranks.
If you want to speed up your climb or skip the grind entirely, check out our Challenge Boosting Services to level up your account fast.
Check out some of our most popular Boosting services:


Frequently Asked Questions (FAQ)
What is the best Black Berserker placement strategy for Gorr?
Position Berserkers behind cover or on high ledges to stay out of direct line of sight. This shields them from splash damage and provides a safe teleport anchor for escaping fights.
Can Gorr teleport through walls with Shadow Harvest?
Yes. Shadow Harvest lets you teleport through solid geometry. As long as a valid Black Berserker is on the other side of the wall, pressing F instantly swaps your position.
What happens if all Black Berserkers are destroyed?
If you destroy all summons, you lose access to your instant Shadow Harvest teleport resets and bonus-damage combos. You need to wait for your E charge or use Living Abyss (Shift) to spawn a new anchor.
How do you unlock Gorr’s Team-Up abilities in Marvel Rivals?
Gorr’s Team-Up options trigger automatically when you add Hela (for Ragnarök) or Venom (for Hive Mind) to your active team roster.