






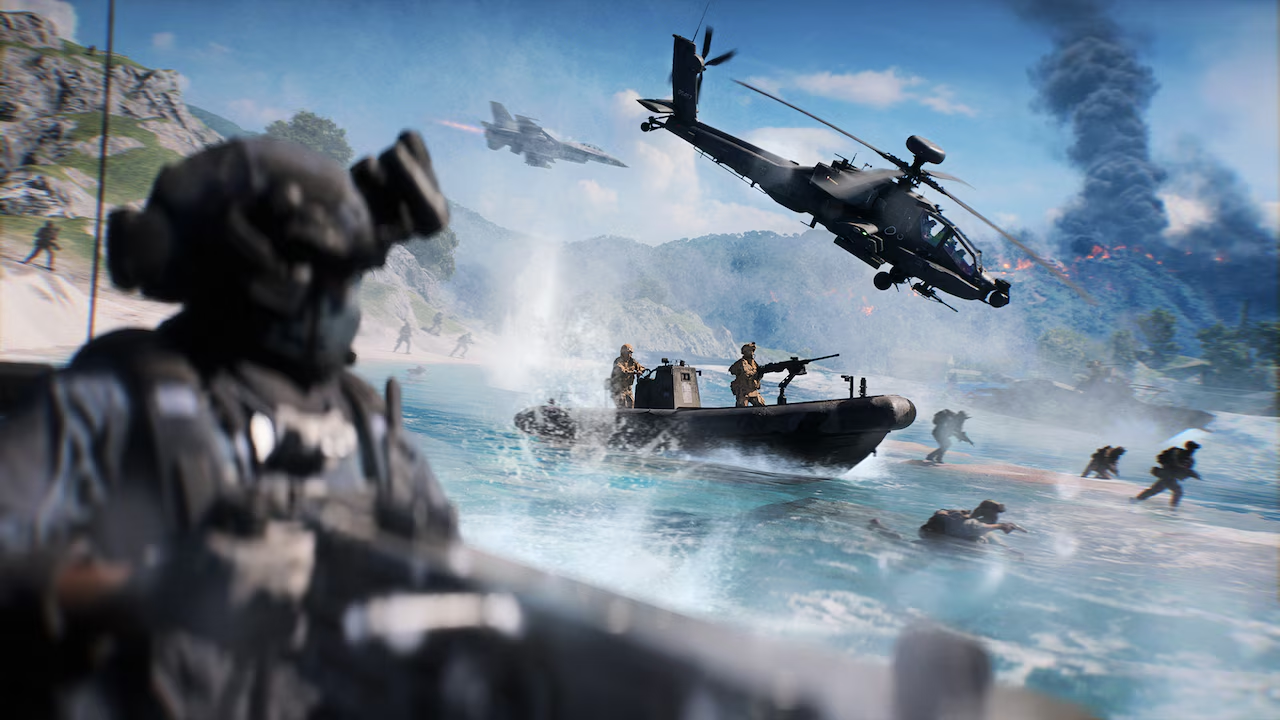
Naval combat in Battlefield 6 Season 4 turns open water into a chaotic, high-stakes kill zone. If you read our BF6 Season 4 Guide: Naval Warfare Release Date & Map Specs, you should know the baseline layout. This tactical guide breaks down vehicle builds, wave ballistics, and squad setups to help you dominate land and sea.
For server updates and live balance patches, check out the Official Battlefield News Hub.
1. Understanding the BF6 Dynamic Wave System
Water is more than just an asset layer in Season 4. It’s a living hazard that alters every gunfight. The game’s dynamic ocean engine simulates real water displacement, forcing you to recalculate lead distances on the fly.
How Ocean Swells Impact Pitch, Roll, and Accuracy
Rough seas constantly push your hull up and down. When firing the 30mm autocannon of the BF6 RCB 90 Patrol Boat across open water, your crosshair will roll with the swell.
- The Swell Window: Fire at the top of a wave crest for maximum vision and flat trajectory. Firing from a wave trough locks your sightline against a wall of water.
- Breaking Lock-Ons: Pitching your boat into a deep trough breaks line-of-sight against coastal TOW launchers and air-to-ground missiles.
Underwater Mechanics & Stealth
Ocean depth serves as an active defense layer. Diving beneath the surface alters body physics, mitigates ballistic damage, and cancels active tracking markers. That gives infantry an immediate reset during open-water engagements.
- Diving Clears Spots: Submerging below two meters instantly drops active 3D spot markers from enemy HUDs.
- Water Drag: Bullets lose 70% of their velocity within three meters of water penetration. Use deep dives to escape coastal snipers.
- Water Drag and Revive: You can drag downed squadmates underwater to safe cover before starting a revive.
2. Naval Vehicle List & Best Boat Loadouts
Match your watercraft deployment to objective requirements using this operational breakdown of the Battlefield 6 Season 4 naval vehicles.
| Vehicle | Capacity | Primary Role | Key Strength |
| RCB-90 Patrol Boat | 2 Seats | Heavy Assault & Spawn Point | Heavy Armor, Mobile Ramp, Mortar Bay |
| 7.7M NSW RHIB | 4 Seats | Rapid Flanking Transport | Fast Acceleration, Tight Turning Radius |
The Meta RCB-90 Patrol Boat Build
The RCB-90 functions as a floating fortress when configured properly. Avoid jack-of-all-trades builds and specialize your crew slots.
- Driver Weapon: 30mm Autocannon. The HMG lacks the armor penetration needed to kill rival gunboats.
- Driver Missile Slot: Wire-Guided Torpedoes. They ignore countermeasures and hit hard against enemy hulls.
- Countermeasures: Thermal Smoke Generator. It breaks missile locks and masks your approach to crowded shorelines.
- Gunner Mortar Bay (120mm): Apply key Battlefield 6 sea combat tips by equipping Airburst shells for beachhead suppression or the Illumination + IR Smoke combo to blind enemy shorelines.
The 7.7M NSW RHIB Tactical Insertion Profile
Unlike heavy gunboats, the 7.7 m NSW RHIB relies entirely on velocity and low profile rather than armor. It serves as a rapid-squad transport designed to flank shore defences and bypass naval chokepoints.
- Tactical Role: High-speed insertion, rear-objective capping, and rapid egress.
- Mounted Armament: Heavy HMG (Seat 2). Best utilized for suppressing coastal infantry rather than engaging heavy armor.
- Passenger Synergy: Passengers retain full 360-degree access to weapons. Run Engineers with C4 or AA Lock-on Launchers in Seats 3 and 4 to deter pursuing aircraft or light craft.
- Operational Directive: Maintain high momentum. Stopping or slowing down near coastal infantry or naval vehicles makes the lightweight hull an immediate target for RPGs and shore artillery.
Compare these naval hulls against land and air assets in our Battlefield 6 Vehicle Tier List: Best Tanks & Aircraft for Conquest.
3. Coastal Map Guides: Tsuru Reef & Wake Island
Open water leaves you exposed to long-range artillery. Knowing where to take cover makes all the difference on coastal maps.
Coastal Map Tactical Comparison Matrix
| Map & Layout Profile | Primary Naval Threat | Critical Chokepoint & Cover | Tactical Objective Strategy |
| Tsuru Reef (6-Island Archipelago) | Coastal TOW Missile emplacements & air-to-sea strikes | Sunken Frigate Wreck (Sector B): Provides 360° hull protection against shore fire. | High-speed channel insertion via a 7.7 m NSW RHIB transport to bypass open ocean sightlines and capture island flags from behind cover. |
| Wake Island (Horseshoe Atoll) | Airfield Shore Batteries & Offshore Jet Patrols | Atoll Lagoon Entry Channel: High-risk choke point prone to sea mine traps. | Utilize the RCB-90 Patrol Boat in BF6 as a mobile beachhead along the outer rim to avoid pushing directly down the central runway. |
Tsuru Reef Tactical Breakdown
This Tsuru Reef map guide focuses on navigating shallow coral formations and narrow shipping channels.
- Harbor Chokepoint Defense: Position heavy gunboats inside the sunken frigate wreck near Sector B. The metallic hull absorbs direct missile impacts while your gunner captures the point from safety.
- Low-Tide Navigational Hazards: Coral reefs become impassable for heavy armor during low swells. Use lightweight craft like the 7.7 m NSW RHIB to clear shallow barriers without grounding the hull.
Wake Island Tactical Breakdown
The iconic Wake Island in Battlefield 6 forces engagement along a tight, highly visible landmass.
- Bypassing the Airfield Chokepoint: Avoid pushing direct frontal attacks down the main runway strip. Circle the outer island rim with heavy patrol craft to launch flanking maneuvers on rear objectives.
- Lagoon Chokepoint Sweeps: The central lagoon entry channel is a high-risk area for defensive sea mines. Send light transports or run sonar sweeps before advancing heavy naval assets into the inner bay.
- Carrier HQ Operations: Defend offshore Carrier HQs against boarding parties by deploying sea mines near the stern launch ramps and holding high-ground flight deck angles.
4. Squad Strategies & Coastal Combat Tips
Naval success relies on coordinated squad roles. A single squad operating with synchronised loadouts can deny enemy beach landings and lock down entire water channels.
The Meta Coastal Squad Composition
| Squad Role | Class | Recommended Gadgets | Primary Duty |
| Naval Captain | Engineer | Repair Tool, Javelin / Torpedo Launcher | Maintains hull health mid-combat and controls vehicle heavy weapons. |
| Beach Recon | Recon | SOFLAM / Motion Sensors, C4 | Paints target boats through smoke and designates coastal armor for missile locks. |
| Invasion Lead | Assault | Smoke Grenade Launcher, Spawn Beacon | Deploys beacons behind beachheads and establishes smoke corridors during landings. |
| Combat Medic | Support | Ammo Box, Defibrillator | Maintains squad uptime inside tight vehicle cabins and handles drag-and-revives. |
Executing the “Mobile Beachhead” Landing
- Approach Angle: Drive the RCB 90 Patrol Boat at full speed directly onto target shorelines.
- Smoke Cover: Gunner fires 120mm IR Smoke onto the beach 50 meters ahead of impact to blind enemy snipers and rocket teams.
- Ramp Deployment: The front ramp drops automatically on contact. The Assault player pushes out immediately, dropping a Spawn Beacon behind static beach cover.
- Fire Support: The Captain stays in the primary seat, keeping the 30mm Autocannon elevated to suppress enemy reinforcements.
Anti-Boat Coastal Counter-Play
Stopping enemy naval pushes requires combining sea traps with land-based anti-armor weaponry:
- The SOFLAM + Javelin Loop: Have Recon designate enemy gunboats from elevated cliffs. Javelin rockets fired from land bypass boat countermeasures by utilizing top-down strike trajectories.
- Shallow Water Mining: Deploy Sea Mines along natural boat approach channels between island flags rather than open ocean areas.
- Choke Point Interdiction: Position Engineers with wire-guided TOW missiles along narrow harbor entries where boats cannot easily maneuver or use dynamic waves for cover.
Apply these essential Battlefield 6 sea combat tips and optimize your infantry builds using our Battlefield 6 Class Guide: Best Roles, Gadgets & Perks.
5. Vehicle Progression & Practice Strategies
Unlocking top-tier boat hardware requires earning thousands of vehicle XP. Attempting to level stock hulls in public Conquest lobbies often leaves you outgunned by fully upgraded gunboats and jets.
In-Game Hardware XP Optimization
Objective Capping & Vehicle Assists:
Vehicle XP accrues fastest through objective captures rather than pure infantry kills. Use fast watercraft to sweep open coastal flags (such as Flag B on Tsuru Reef) to farm objective capture bonuses safely.
Driver-Gunner XP Sharing:
Vehicle XP is fully shared across active crew seats. Teaming up with an experienced driver who has already unlocked the 30mm Autocannon allows gunners to collect assist XP and unlock high-tier mortar shells much faster.
Offline & Portal Mastery:
Practice boat handling, dynamic wave compensation, and mortar arc trajectories in custom solo/co-op Portal matches before jumping into ranked multiplayer environments.
Optional Time-Saving Shortcuts:
- Accelerated Progression: If you prefer to bypass the grind entirely and access high-tier countermeasures and weaponry immediately, players can opt for an Account Level Boost.
- Targeted Hardware Unlocks: Players looking for a controlled environment often consider dedicated Battlefield 6 Bot Lobbies that offer a private setup to farm hardware XP without interference.
Once your vehicle hardware is maxed out, complete your setup by unlocking exclusive seasonal camos and vehicle skins through active System Override Skin Codes.
Conclusion
Dominating sea combat in Season 4 requires more than just holding down the trigger. Mastering wave timing, building specialized RCB-90 loadouts, and using water cover effectively will keep your squad on top of the scoreboard.
Upgrade your watercraft, lock down the chokepoints on Tsuru Reef, and take control of the ocean.
Check out some of our most popular Boosting services:


6. Frequently Asked Questions
How do I deploy the front ramp on the RCB-90 Patrol Boat?
The front ramp deploys automatically when the bow beaches onto land or hits a dock structure at low speed.
Does diving underwater protect you from explosive damage in BF6?
Water reduces splash damage from land explosives, but direct hits from torpedoes or naval mortars will still eliminate swimming players.
What is the best weapon to counter the RCB-90 from the shoreline?
The Engineer’s wire-guided TOW launcher deals heavy damage and bypasses thermal smoke if you maintain a direct manual sightline.
How do wire-guided torpedoes perform in the BF6 Dynamic Wave System?
Ocean swells deflect optical sightlines, so fire torpedoes along wave troughs or from elevated crests to prevent surface displacement from interrupting guidance.
What is the fastest way to repair a boat while under heavy fire?
Assign an Engineer to seat 3 or 4 in the naval vehicle to continuously run the Repair Tool on the inner hull mid-fight.