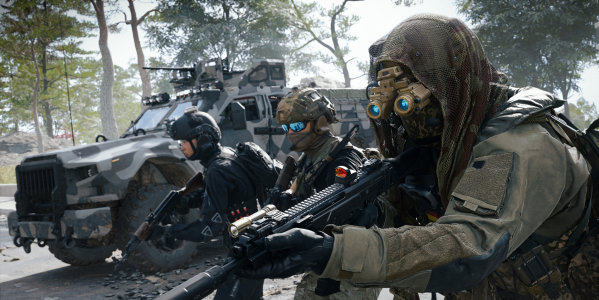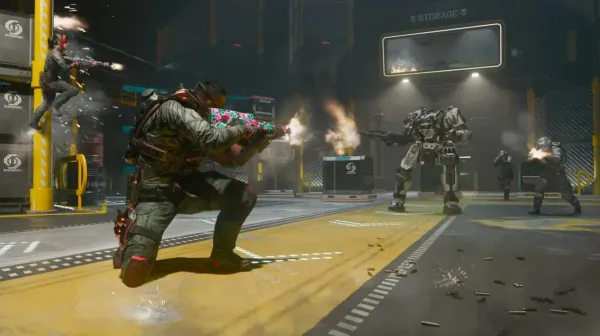




Ashes of the Damned is Black Ops 7’s first full Round-Based Zombies map and one of its largest survival spaces. Six locations sit across the Dark Aether, connected by dangerous fog-covered roads that make Ol’ Tessie essential for safe travel.
Successful runs depend on activating the vehicle, restoring local power, installing Pack-a-Punch, upgrading one dependable weapon, and preparing for Ravagers, the Zursa, and other map-specific threats.
Ashes of the Damned at a Glance
| Feature | Key Information |
|---|---|
| Map type | Large Round-Based Zombies map |
| Main areas | Six |
| Wonder Vehicle | Ol’ Tessie |
| Main Wonder Weapon | Necrofluid Gauntlet |
| Other Wonder Weapons | Ray Gun and Ray Gun Mark II |
| Major enemies | Ravagers and Zursa |
| Fast travel | Ol’ Tessie and powered Jump Pads |
| Main trap | Saw Blade Trap |
| Advanced mode | Cursed Mode with Relics |
The official Zombies gameplay deep dive confirms the map’s vehicle, enemies, traversal tools, traps, currencies, and progression systems.
The Story Behind Ashes of the Damned
The story begins after the events of Black Ops 6’s Reckoning. Weaver, Grey, Carver, and Maya collide with alternate versions of Dempsey, Takeo, Nikolai, and Richtofen inside the Dark Aether.
These eight dedicated crew members awaken in a distorted realm where locations from different periods have been pulled together. A soul-harvesting entity known as the Warden controls this space, while the crew searches for answers and a route forward.
Players can select ordinary BO7 Operators, but choosing members of the dedicated crew provides additional conversations and stronger story context.
The existing community-maintained map reference remains useful for tracking smaller Easter Eggs and minor location details.
Understanding the Six Map Locations
Janus Towers Plaza
Every standard run begins at the remains of Janus Towers. This area contains the first important step for activating Ol’ Tessie and opening the wider map.
Vandorn Farm
Vandorn Farm is an old rural settlement with open ground, tight buildings, and a power objective. It also appears separately as a smaller Survival map.
Blackwater Lake
This frozen lakeside location contains cabins, narrow routes, and another power-related objective. Avoid becoming trapped inside a building when a large horde reaches the area.
Ashwood
Ashwood is a frontier settlement and one of the most important early destinations. Its garage provides the upgrade that mounts Pack-a-Punch onto Ol’ Tessie.
Exit 115
Exit 115 contains a roadside stop, diner, and freeway structures. Several quest items and vehicle-upgrade steps bring players back to this area.
Zarya Cosmodrome
The Soviet-era launch facility contains major quest objectives and late-run combat encounters. Enter with armor, upgraded damage, and an escape route prepared.
How to Activate Ol’ Tessie
Ol’ Tessie is not available immediately. To activate the truck:
- Enter the Server Room at Janus Towers Plaza.
- Break the circular floor grate.
- Collect T.E.D.D.’s head.
- Install the head in Ol’ Tessie.
- Enter the truck and choose your first route.
Ol’ Tessie can carry the squad, break through route barriers, and damage enemies. However, Ravagers can latch onto it, while the Zursa can charge into the vehicle.
The truck can become temporarily inoperable after taking heavy damage. Clear attached enemies quickly and repair it instead of abandoning it deep in the Fog.
How to Unlock Pack-a-Punch
Ashes of the Damned uses a mobile Pack-a-Punch machine rather than leaving it in one permanent room.
A practical opening sequence is:
- Activate Ol’ Tessie at Janus Towers Plaza.
- Travel through either Vandorn Farm or Blackwater Lake.
- Clear the infestation from the local Power Pump.
- Restore power and continue toward Ashwood.
- Clear the Ashwood Power Pump.
- Switch on the local power.
- Park Ol’ Tessie inside the newly opened garage.
- Install Pack-a-Punch on the truck.
Once installed, Pack-a-Punch travels around the map with Ol’ Tessie. Weapons can receive three upgrade tiers, improving damage and ammunition capacity.
Prioritize one primary weapon rather than spreading Essence across several weak guns.
Enemy Types You Will Face
Standard and Armored Zombies
Standard zombies form the main horde. Armored variants move more slowly but absorb more damage, so target exposed areas instead of relying entirely on explosive splash damage.
Ravagers
Ravagers travel in aggressive packs and can consume dropped Salvage or other provisions. They can also attach themselves to Ol’ Tessie while it moves.
Collect valuable drops quickly and remove Ravagers before beginning a long drive.
Zursa
The Zursa is an Elite undead bear with heavy melee attacks, powerful charges, and swarms of parasitic Zombees.
Fight it in an open area, keep moving sideways during charges, and avoid standing between the Zursa and Ol’ Tessie.
Wraith Seeds
Wraith Seeds create volatile environmental threats and add pressure around already dangerous routes. Destroy or avoid them before committing to a narrow path through the Fog.
Wonder Weapons
Ashes of the Damned supports three main handheld Wonder Weapons:
- Necrofluid Gauntlet: Fires liquid spikes, damages targets at range, and can draw life energy, items, and Power-Ups toward the user.
- Ray Gun: A powerful explosive energy pistol suited to crowd control.
- Ray Gun Mark II: Fires three-round bursts that can penetrate several enemies.
The Necrofluid Gauntlet connects directly to the Main Quest and several map puzzles. Obtaining it requires a multi-stage side quest involving Uber Klaus, map items, and a symbol puzzle.
Do not delay ordinary weapon upgrades while waiting for a Wonder Weapon. A high-rarity, Pack-a-Punched standard weapon remains more reliable than repeatedly gambling at the Mystery Box.
Essence, Salvage, and Weapon Upgrades
Essence pays for doors, Pack-a-Punch, perks, traps, Jump Pads, and other map interactions.
Salvage supports:
- Weapon-rarity upgrades
- Ammo Mods
- Armor and equipment
- Craftable support items
Ravagers can eat dropped Salvage, so pick it up before leaving an area.
Players who want to plan weapon levels across different modes can use these faster BO7 Weapon XP methods without treating every XP source as a map-specific reward.
Best Perks for Ashes of the Damned
A reliable survival setup includes:
- Jugger-Nog: Raises maximum health.
- Stamin-Up: Helps with movement across the large map.
- Speed Cola: Improves reload and armor-replate speed.
- Quick Revive: Supports health regeneration and faster revives.
- Deadshot Daiquiri: Improves precision and critical bullet damage.
- Double Tap: Increases weapon fire rate.
Solo players should also craft a Self-Revive Kit. In co-op, avoid buying every perk before upgrading your primary weapon and armor.
Jump Pads, Saw Blade Traps, and the Fog
Jump Pads become usable after local power has been restored. They provide faster travel between selected locations and can help separated teammates regroup.
Saw Blade Traps use Gasoline and Essence to draw zombies toward a multi-bladed machine. Use them against dense hordes, but keep an open exit in case an Elite enemy enters the area.
The Fog is the map’s main environmental threat. Enemies appear faster, move more aggressively, and deal greater pressure on the connecting roads. Explosive growths also make careless travel dangerous.
Use Ol’ Tessie or a Jump Pad whenever possible rather than crossing a long Fog route on foot.
Main Quest and Cursed Mode Unlocks
The Main Quest uses Ol’ Tessie, the Necrofluid Gauntlet, vehicle upgrades, serum ingredients, location-based puzzles, and a final encounter with Veytharion.
Progressing through the quest unlocks access to Cursed Mode, where players begin with stricter old-school rules and can discover Relics that make later matches harder.
Ashes of the Damned contains nine Relics. Equipping them can introduce restrictions such as reduced resources, disabled systems, or tighter perk limits. In return, higher Cursed tiers provide exclusive rewards and additional challenges.
T.E.D.D. Tasks also offer smaller match rewards, including equipment, tools, and random perks based on performance.
Camos, XP, and Progression
Ashes of the Damned supports Zombies weapon levels, Weapon Prestige, Military and Special camo objectives, Mastery Camos, Mastery Badges, and account XP.
However, Singularity and Dark Matter do not unlock through this map’s Zombies challenges. They belong to separate Multiplayer progression paths.
Players comparing that route can review the Black Ops 7 Dark Matter Guide without confusing Multiplayer mastery with Ashes rewards.
The existing separate Multiplayer Singularity route remains available for the same reason.
For wider challenge assistance, the existing supported BO7 camo progression page keeps the different mode-specific options separated.
You can also use How To Check Your Black Ops 7 Stats to compare account progress and weapon performance rather than judging a run only by its final round.
Solo and Squad Survival Tips
Solo
- Activate Ol’ Tessie before spending heavily on optional doors.
- Keep a Self-Revive available.
- Upgrade one weapon early.
- Avoid long Fog crossings on foot.
- Repair and reposition the truck before starting a major objective.
- Exfil before the difficulty outscales your equipment.
Squad
- Assign one player to drive while others protect the truck.
- Split door and objective costs when possible.
- Call out Ravagers before they consume drops.
- Keep one teammate focused on revives and crowd control.
- Regroup before starting Main Quest encounters.
- Use Jump Pads when teammates become separated.
The current Black Ops 7 category groups the wider game, account, camo, and progression options outside this map-specific walkthrough.
Check out some of our most popular Boosting services:


Final Thoughts
Ashes of the Damned rewards players who understand its map systems rather than simply chasing higher rounds. Activate Ol’ Tessie, restore power, install Pack-a-Punch, collect Salvage quickly, and prepare before entering the Fog.
Once vehicle travel, weapon upgrades, and enemy priorities become familiar, the map becomes much easier to manage. From there, players can pursue the Necrofluid Gauntlet, Main Quest, Cursed Relics, camo challenges, or high-round survival.
Ashes of the Damned FAQs
What is Ashes of the Damned in Black Ops 7?
Ashes of the Damned is BO7’s first full Round-Based Zombies map. It contains six Dark Aether locations connected by fog-covered roads and uses Ol’ Tessie as its main vehicle.
What are the six Ashes of the Damned locations?
The six main locations are Janus Towers Plaza, Vandorn Farm, Blackwater Lake, Ashwood, Exit 115, and Zarya Cosmodrome.
How do you activate Ol’ Tessie?
Enter the Server Room at Janus Towers Plaza, break the circular floor grate, collect T.E.D.D.’s head, and install it in the truck.
How do you unlock Pack-a-Punch?
Activate Ol’ Tessie, restore power along the route to Ashwood, clear the Ashwood Power Pump, and park the truck inside the opened garage. Pack-a-Punch can then be installed on the vehicle.
What Wonder Weapons are on Ashes of the Damned?
The map includes the Necrofluid Gauntlet, Ray Gun, and Ray Gun Mark II. The Gauntlet has its own side quest and plays an important role in the Main Quest.
What are the main special enemies?
Ravagers attack in packs, consume dropped resources, and cling to Ol’ Tessie. The Zursa is an Elite undead bear that charges players and carries parasitic Zombees.
How do you unlock Cursed Mode?
Cursed Mode becomes available through Ashes of the Damned Main Quest progression. It introduces stricter rules, discoverable Relics, increasing difficulty tiers, and exclusive rewards.
Can Ashes of the Damned be completed solo?
Yes. The Main Quest and normal map systems support solo play. However, solo players must manage Ol’ Tessie, armor, weapon upgrades, revives, and objective pressure without help.