



A Harvester run can go perfectly for several minutes and still end with nothing. You can reach the structure, survive the internal hazards, open the reward containers, then lose the blueprint to the Queen or another Raider before reaching extraction.
The safest approach is to treat the encounter as three separate jobs: reach and solve the Harvester, decide whether the Queen is worth fighting, then leave as soon as the loot justifies the run.
The Harvester remains an active rotating map condition. The current official schedule continues to rotate it through Dam Battlegrounds, Spaceport and The Blue Gate, so check the live Harvester map condition schedule before building a loadout around it.
| Stage | Main Goal | Biggest Risk |
| Before deployment | Confirm Harvester is active and prepare supplies | Bringing expensive gear into the wrong condition |
| Approach | Reach an entrance without drawing the Queen | Mortars, laser pressure and other Raiders |
| Core sequence | Find 3 Fusion Cores and insert them | Fire reset and electrical surge |
| Target phase | Destroy 12 yellow targets | Losing progress during another fire cycle |
| Reward phase | Secure Harvester loot and blueprints | Other players reaching the containers first |
| Optional Queen fight | Target Core and leg joints | Spending resources you did not need to risk |
| Extraction | Protect the most valuable drop and leave | Staying for unnecessary extra loot |
The first decision should happen before matchmaking, not when the Queen is already looking at you.
Prepare for the Harvester You Actually Plan to Run
You do not need the same loadout for a puzzle clear and a full Queen kill.
For a standard Harvester run, prioritize enough ammunition to clear the yellow targets, healing for mistakes, shield recovery and mobility. Solo players should value a familiar weapon and a reliable escape route over taking their most expensive equipment simply because Harvester is an endgame activity.
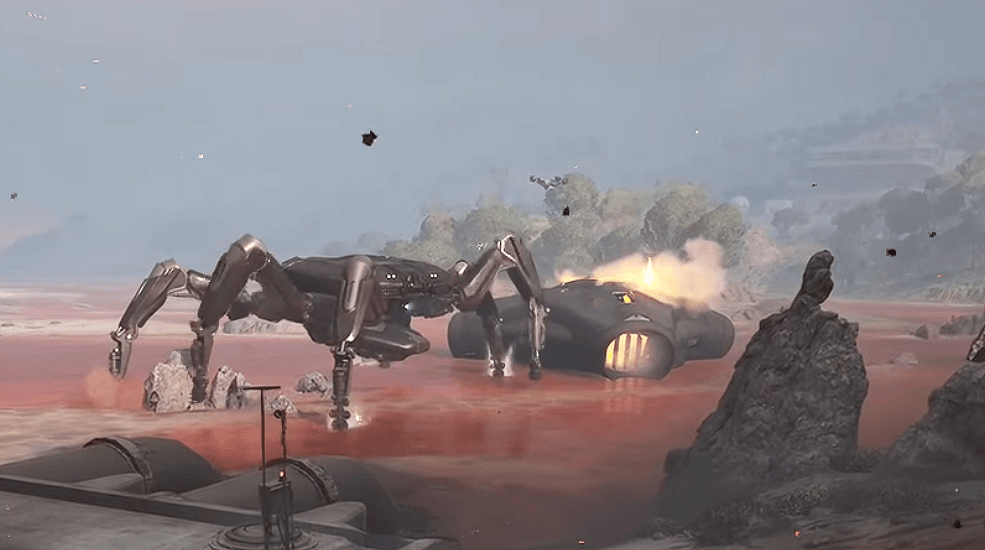
If you intend to fight the Queen, preparation changes. Her armor makes weak point damage far more important, and her current weaknesses remain the central Core and leg joints. She also uses mortars, a laser, close range ground pressure and an electrical attack around the Harvester.
The existing ARC Raiders solo extraction loadouts and survival tips are useful if you are attempting the activity without a coordinated trio.
If the objective is specifically the event rewards and repeated Harvester or Queen attempts are the part stopping your progress, Explore ARC Raiders Harvester Boost fits that problem directly. The service currently separates Harvester loot, Queen plus Harvester loot, and a full Queen kill with all loot, so the option can match the part of the encounter you actually need rather than forcing every run into a boss kill.
How to Complete the Harvester Puzzle
The puzzle itself is predictable once you understand what the structure is trying to do.
1. Get Inside Without Starting an Unnecessary Queen Fight
The Queen guards the Harvester, but you do not have to kill her to complete the internal puzzle. Watch her position, choose the safest entrance and move inside when her attention is elsewhere. This distinction is important because fighting first can consume the ammunition and healing you need later.
2. Collect Three Fusion Cores
Inside, you need three Fusion Cores.
One appears around the central area. The others are obtained by breaching containers on the upper level. Bring all three toward the central pillar before trying to activate the next phase.
3. Insert All Three Cores Quickly
Open the receptacles around the base of the pillar and insert the three Fusion Cores in quick succession.
Once the sequence is active, 12 pulsating yellow targets appear around the interior. These are the real objective. Destroy all 12 to shut down the Harvester defenses and open the central reward containers.
4. Respect the Fire Cycle
The Harvester periodically warns you before filling the interior with fire.
Do not try to squeeze in one final interaction after the warning. Leave the danger area and return when the discharge ends. Fire can also eject Fusion Cores from the central pillar, extending the puzzle if you have not secured enough progress.
The current breakdown of the Harvester fire and electricity cycle shows why timing the puzzle is more important than simply rushing every interaction.
5. Manage the Electrical Surge
After the cores are inserted, the Harvester can also produce an electrical effect associated with the Queen. Current Harvester documentation notes that it drains shields and briefly stuns rather than functioning like the lethal fire discharge.
That means you should recognize the two warnings correctly instead of reacting to every hazard in the same way.
Should You Kill the Queen or Skip Her?
If your only objective is Harvester reward containers, skip her unless circumstances make the fight worthwhile.
Killing the Queen becomes relevant when you also want her ARC drops, especially the Queen Reactor, which is used when crafting the legendary Equalizer and Jupiter.
If you do commit to the fight, focus on exposed weak points rather than dumping ammunition into armor. The current Queen weak point and attack pattern breakdown identifies the Core and leg joints as the important damage areas.
MitchCactus also has a dedicated guide on how to kill the Queen in ARC Raiders safely if the boss itself, rather than the Harvester puzzle, is your main problem.
The mistake is treating the Queen as mandatory. Sometimes the highest value play is opening the Harvester and leaving her alive.
What Loot Can the Harvester Drop?
Completing the core sequence opens the central reward containers. The headline drops are the legendary Equalizer and Jupiter blueprints, with current Harvester records listing one to three blueprints from the reward containers.
These two blueprints are strongly tied to the Harvester rather than ordinary loot farming, which makes the event especially valuable when either weapon is still missing from your progression.
For the wider blueprint pool and where other recipes come from, use the ARC Raiders blueprint locations guide. If you are only missing one specific blueprint and do not want to repeatedly wait for event rotations, the current ARC Raiders Blueprints options provide a separate targeted route.
Extract as Soon as the Run Becomes Valuable
Finishing the puzzle is not the end of the run.
Once a Jupiter or Equalizer blueprint enters your inventory, your objective changes from farming to protecting the drop.
Use this extraction sequence:
- Move the most important item into a Safe Pocket if your current setup provides one.
- Check the Queen’s position before leaving the structure.
- Listen for approaching Raiders before crossing exposed ground.
- Choose an extraction route you already understand.
- Avoid ordinary loot fights once you are carrying the item you came for.
- Extract instead of returning to the Queen simply because she is still alive.
This is where many otherwise clean Harvester runs fail. The reward containers create a predictable point where several players may suddenly have valuable loot, so staying around after the payout adds risk without necessarily improving the result.
Harvester Mistakes That Cost Runs
Do not deploy without checking whether the Harvester condition is active.
Do not assume the Queen has to die before you can solve the puzzle.
Do not insert Fusion Cores without being ready to work the yellow target phase.
Do not ignore the fire warning while trying to finish one last interaction.
Do not waste the Queen fight shooting protected armor instead of her weak points.
Most importantly, do not keep looting after securing the blueprint you actually entered the event to find.
Conclusion
The Harvester is much easier once you stop treating it as one giant boss encounter.
Confirm the map condition first. Enter without wasting resources on the Queen, collect and insert the three Fusion Cores, destroy all 12 yellow targets and secure the reward containers. Only add the Queen fight when her separate loot is part of your objective.
Then leave.
In an extraction game, the best Harvester clear is not the run where you kill everything around the structure. It is the run where the blueprint reaches Speranza with you.
Frequently Asked Questions
Where does the Harvester spawn in ARC Raiders?
The current Harvester condition rotates through Dam Battlegrounds, Spaceport and The Blue Gate. Check the official live Map Conditions page before deploying because its active map and time rotate.
Do you need to kill the Queen to complete the Harvester?
No. You can complete the Harvester core sequence while the Queen is alive. Killing her is optional if you also want Queen specific loot.
How many Fusion Cores does the Harvester need?
You need three Fusion Cores, followed by destruction of 12 yellow targets inside the structure.
What blueprints drop from the Harvester?
The Harvester reward containers are associated with the legendary Equalizer and Jupiter blueprints. Current Harvester documentation lists one to three of these blueprints among the final rewards.
Can you complete the Harvester solo?
Yes, but solo runs leave less room for mistakes because one player must manage the cores, hazards, Queen pressure, other Raiders and the extraction. A squad can divide those responsibilities, while solo players benefit more from patience and a preplanned exit.